If you have free time and the desire to make something with your own hands, you can make wonderful crafts to decorate your summer cottage, vegetable garden, orchard or front garden located next to your house. Such crafts are made from various available materials and objects: empty plastic bottles, foam plastic, old car tires. In this article we will dwell in detail on how to make birds and animals from plastic bottles for garden decoration.


Crafts made from plastic bottles in the shape of various birds look very impressive on a beautiful well-groomed lawn, in a flower bed among flowers, as well as under trees and shrubs.
In order to build them, you need to prepare the following materials:
Using these items, as well as guided step by step instructions and with your own imagination, you can make a beautiful peacock, which will certainly find a worthy place in your summer cottage.

Having prepared everything you need, you can safely get down to business. First you need to thoroughly rinse, dry and peel off the labels from plastic containers. To make a peacock tail, you need to cut the middle part of the bottle into 3 oblong “tongues”, having first removed the bottom and neck of the bottle. Next, one end of this plastic strip is rounded in the shape of a bird feather and cut into small strips along the edges. Then an oval made of blue polyethylene and a circle of foil are attached to the rounded end with a stapler. By analogy, many similar tail feathers are made. Then a semicircle is cut out from the middle part of a large bottle and these feathers are stapled to its edges. It is necessary to lay out the feathers in several consecutive rows.

The body of the bird is made from a 5-liter bottle, from which the neck is first cut off, and from a 2-liter bottle without a bottom, fastened together with tape. The remaining elements will be used to make a peacock's head. The neck of the bottle is cut and twisted into an oblong funnel with a long beak-like point. This part is fastened to the bottom of another bottle and secured with tape to the finished body of the bird. The plumage for the bird's body can be made from blue plastic bags, which are cut into strips with pointed ends and attached to the body of the bird in overlapping rows from the tail to the neck.

The tail and body of the peacock are fastened with a rope; for this, a hole must be made in advance at the place of fastening. The peacock is attached to a stick from below so that it can be firmly fixed in its future location. The eyes and beak are painted with acrylic paints, and a crown is made from the remains of plastic containers and foil. The peacock is ready. To make the weight heavier, sand is poured inside the peacock.

By analogy, you can create other types of birds. For example, it won’t be difficult to make funny penguins. Instead of feathering, it will be enough to simply paint their body with paints. To create more complex structures, in addition, plastic tubes for the legs, foam for the head, metal mesh for the frame, or a car tire can be used.


You can make an entire zoo out of plastic bottles for your summer cottage. Fairytale horses, donkeys, frog princesses, elephants, bees, and many other representatives of the fauna will certainly bring brightness, beauty and positivity.

To, for example, create funny piglets with your own hands, you will need 5 liter bottles, acrylic paints and varnish, scissors, dish sponge and marker. Initially, excess parts are removed from the plastic bottle - the rim and the handle of the cap. Next, a long oblong hole is cut from the bottom almost to the neck and parallel to it with reverse side bottle, a wider hole is cut out. Ears and a tail are made from excess trimmings. Next, the pig is painted in 2-3 layers and, after complete drying, is varnished. Such crafts are very practical and functional and can be used for growing flowers.


Crafts made from plastic containers are an easy and economical way to decorate an area.
Elvira Goleva for DecorWind.ru


Elena Dyachenko
Every summer in our city of Severodvinsk there is a traditional “Stroller Parade” dedicated to City Day.

This is not the first time our family has participated in such a large-scale, spectacular and family-uniting event. This year we decided to make a stroller" Firebird"Based on the fairy tale by Pyotr Ershov "The Little Humpbacked Horse".

Firebird my husband and I made it from plastic bottles and covered it with bright spray paint.

And I sewed costumes for fairy tale heroes for all the members of our support group. My two-year-old granddaughter Alyonushka suited the role of “The Little Humpbacked Horse”

Mom became "Mare". A bright suit was made for my niece" Firebirds"Alyonushka's grandfather reincarnated as Ivan the Fool,"

and I'm in "The Tsar Maiden". The rest of our group also wore beautiful costumes corresponding to the fairy tale.

After the parade of strollers, I decided to plant " Firebird" to the flowerbed located on the territory of the "Children's House", which I create every year.
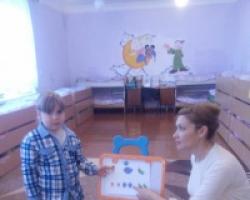
Together with the children we plant seedlings.

Kids enjoy caring for plants, watering them, loosening the soil, and watching the plants grow.


In addition, the children get acquainted with the types of plants and their structure (flowers, grass, bushes, trees, and become familiar with the world of beauty. Also, with our own hands, my husband and I made figurines of caterpillars, frogs, ladybugs, snails, bees, grasshoppers, butterflies and other insects that children become familiar with during walks.


The firebird was a worthy decoration for the flower bed, which I called “The Cheerful Flower Garden,” and evoked pleasant emotions not only in children, but also in adults. Thank you for your attention.

Publications on the topic:
For work we will need: 1. Plastic bottles of various configurations, the appearance of the doll depends on the configuration of the bottle; 2. Sculptural.
Hello dear colleagues! Many of us probably had to invent and make various aids and devices for.
Sakura is one of the most beautiful trees. Flowers fascinate with their tenderness, simplicity and beauty. In Japan, sakura is not grown for its fruit.
You will need: 60 empty plastic bottles of the same shape; foam rubber - 1.5 x 1.1 m; calico - 1.5 x 1.1 m; fabric ribbons - 7-8 wide.
A little about this flower. Lilies are very beautiful flowers, they belong to the Liliaceae family. The lily has large buds of various shades.
One of the popular garden decorations today is the heron, so for owners of suburban areas the question becomes very relevant: “How to make a heron for the garden with your own hands”? Buying special figurines for your own “hacienda” now, during a crisis, is an expensive business. Many people want to decorate their garden area on their own using improvised means. Here are some tips.
An unusual decoration for any dacha - a do-it-yourself heron made from scrap materials.
The main material for garden crafts is plastic, or rather bottles made from it. To create a cute heron, any housewife should stock up on the following:
The method for creating such a miracle bird is quite simple. A mandatory requirement is accuracy, patience and minimal creativity. Sometimes it takes men's hands to work with the drill as efficiently as possible.

A beautiful bird for garden decoration can be made from several 1.5 liter plastic bottles, wire, glue and paints.
The sequence of actions when creating a heron is as follows:
Return to contents
The purpose of creating figurines with your own hands is aesthetics. Such impressive garden accessories, and even those created with your own hands, give a special coziness not only to the garden, but also to the apartment. Moreover, not only a drill and wood, but also an ordinary frying pan can become available tools.

The most difficult material for creating figures with your own hands is clay.
To create a bird this way you will need:
First you need to collect the “feathers” of the heron. To do this, cut off the bottoms of the bottles. The containers must be the same size. Then ordinary sand is used, which any gardener has. Place it on a cast iron frying pan and heat it up, then put the bottle bottoms there, one after the other, thereby leveling them. This creates the foundation for the heron's plumage.
Then the “feathers” are collected onto the fishing line. First, two holes are created in the bottoms using a hot awl. They should be parallel to each slice. The result is a “feather garland”.
The third stage is the formation of the body of the figure. To do this, you need to take a large plastic container with a stopper. This is where the metal rod is inserted. This is the neck of the future bird, which is wrapped in polyethylene. Finally, a garland of bottoms is placed around the neck and base. The main thing is that the layers should fit as tightly as possible to each other. Here the heron is ready. What remains are the eyes, created from corks, and the beak, cut from plywood and painted. The legs are based on metal rods that pierce the lower part of the plastic body. Such legs are easy to stick into the ground, and the figure itself can be simply moved from one part of the garden to another.
Return to contents
A more complex option is a clay heron, which can decorate not only a dacha, but also an apartment, as it looks very stylish.

To create figures from cement, you need to make a strong frame.
You will need:
The clay is shaped into a rope by rolling. They connect it. They create another version of it, only longer, and lay it on top of the first one. They connect again. This is repeated several times: for a heron you will need about 20 strands, each of which is longer than the other.
The second step is to make a tourniquet of shorter length than all previous ones and apply it to the formed head of the heron. Moreover, the head itself should be smaller than the body.
The third stage is the creation of a clay cake. This is the forehead of a bird. The flatbread is folded at the edges. Now you need to use a stacker and slip to level the surface. Next, you need to let the future figurine dry.
The fourth step is bird's claws. They are created from thin clay strands. The best option– create a semicircular shape for them. This makes the claws look more voluminous.
At the fifth stage, bird wings are created from the bottoms of plastic bottles in the same order as described above. The main thing is to use a stacker to mark the places where the plumage will be located. Then the beak and eyes are created from bottle caps and plywood.
After which you should burn the bird, preferably in a specialized oven, and use paints intended for ceramics of the lightest tone, so that the product looks like a heron.


As you know, plastic bottles come in different sizes, shapes and colors. This allows you to create a wide variety of crafts from them: both the simplest, such as vases, targets, blades, and quite voluminous and complex - figurines of animals, birds, even furniture and entire houses. So we came up with the idea to teach you how to create a fairy-tale character - the Firebird craft, a master class will be given in this article.
We must admit that this task is not an easy one. After all, the firebird is fairy tale character, he's fictional. You won't find anything like this in nature. She was only seen in pictures in children's books. This is how she is in our imagination.
But we are not used to retreating from our intended goal. In nature there is a bird very similar to this fairy-tale character. This is a peacock. We will take this as a basis. So, the lesson begins: how to make a firebird from plastic bottles.
As an example, we decided to take the process of making a white peacock. Let this be like a framework or outline that will help you implement your idea. After all, the white peacock differs from the firebird only in color. All you have to do is color your bird of happiness so that it finally looks like a character from our childhood.
Take thick foam and cut out the base of the bird's body from it.

Cut off the neck and bottom from the painted bottle.

Cut the resulting cylinder into two parts.

We divide each part into two more equal ones. As a result, we get four parts of the same size. They need to be slightly rounded on the top side.


Let's start working on the tail. The basis for it is a sheet of linoleum. Sheet size: 1.2x1.4 m.

Now we begin to fill the space of the tail with feathers, row by row. To ensure that the feathers stick well to the linoleum, we make punctures with an awl and attach the feathers through these holes using wire.

Look how great the tail turned out.

The tail is attached to our foam base using nails, which are masked with white paint.

We are working on the wings. Cut a small cylinder from the bottle and cut it into two equal parts. Then these parts are cut into teeth and attached to the base with nails.

The process of working on the plumage continues until the entire base is covered with feathers.

Now we are working on the feathers of the crest. Cut out a piece from plastic that is shaped like a spoon.

Cut the upper round part into cloves and bend the leg in the middle.

Paint the ornament.

For the future beak, cut a triangle of the required size from the neck of the bottle.

Paint it with white paint and fold it in half.

Attach the beak to the head first from the bottom, then from the top.

Now we glue the prepared crest feathers to the head and draw beautiful eyes.

To make the paws we will need two bottles. We attach them to the peacock.

Final chord - choose for the bird best place in the garden. For stability, insert two tubes into the bottle legs and dig into the ground. 
Since this is still a white peacock and not a firebird, all you have to do is color it. As you remember, we have already covered the peacock with paint, it will serve as a base for us. Therefore, you can use spray paint on top. Or any other, to your taste. Here is an example of a coloring page firebirds one of the craftsmen.

Below is another idea - a DIY firebird pattern made from plastic bottles. This version of the bird of happiness was made by a needlewoman mother with her children.


Watch the video with detailed lessons below.