It can be argued that representatives of champignon mushrooms are one of the most common edible mushrooms; there are more than 60 species of them. You can meet representatives of this family on all continents except Antarctica; they can grow not only in the forest, but also in the field, in the garden or in the meadow, on open areas in the steppe and desert. Active growth of mushrooms, provided there is sufficient nutrition and soil moisture in the middle zone, can be observed from May to October. Having studied the conditions for growing champignons, you can easily master the technology for producing them at your summer cottage, not only in the warm season, but also in winter. Champignons are used to prepare various dishes, including original sauces. In Mediterranean countries they prefer to be used raw in salads.
Since champignons are classified as saprophytic plants, humus-enriched soils can be considered an ideal place for them to live, so they can often be found on a forest edge covered with a thick layer of fallen leaves or on a pasture manured by coarse grass. cattle. Successful industrial cultivation of the fungus will also require an environment rich in decomposing organic compounds.
For industrial cultivation, two types of champignon are used:
Meadow and field mushrooms are bred less frequently.
Champignons are hat mushrooms; they have a central stem, its height is 5-6 cm. The mushroom cap usually has a diameter of 5 to 10 cm, but you can find individuals with a cap more than 30 cm in diameter. At the beginning of growth, the mushroom has a bell-shaped or spherical cap, then it becomes convex and outstretched.
Based on the color of the cap, mushrooms are divided into several groups:
As the mushroom grows, the shade of its plates changes: if in a young mushroom they have a delicate, pinkish color, then in an older one they are red-brown, then they become dark burgundy.
To grow champignons in a suburban area, you can use:
Ideal conditions can be considered premises with air humidity of about 85-90% and a temperature above 12°C, preferably in the range from 13 to 30°C. Regarding illumination, it should be noted that champignon is not picky about it; a good harvest can be obtained by growing mushrooms in a dark room.
The main attention should be paid to the preparation of the nutrient medium, i.e. substrate. Compost is prepared by mixing straw bedding with fresh horse manure. Straw obtained from winter cereal crops with a mixture of horse and cow manure is often used. But if necessary, pig or sheep manure or chicken droppings are also successfully used; straw is replaced with chopped corn stalks or fallen leaves from trees.
Experts warn: you should never use rotten straw or rotted manure!
To improve the quality of the substrate, add to it:
A stock of manure or chicken droppings intended for preparing a nutrient medium is placed in piles on a leveled and covered with roofing felt or concrete area, compacted well, then covered - the possibility of exposure to sunlight or rainwater should be excluded. You can also use a shed for storage. They begin to prepare the substrate in advance, about a month before it needs to be placed in boxes, trenches or beds.
Straw mixed with manure is composted, i.e. provoke its decomposition under the influence of microorganisms. Since a host plant is not required for the growth of champignons, it is possible to grow champignons at home only if the champignon compost contains a sufficient amount of:
In addition, the quality of compost is increased by adding complex mineral fertilizers and meat and bone meal. The addition of gypsum helps to structure the compost mass and prevent it from caking.
Successful cultivation of champignons largely depends on the recipe and how accurately the compost mass is prepared in accordance with it. Experienced mushroom growers have their own time-tested formulas for the highest quality substrate. Beginning amateur benders can use the following formulas: to 12 kg of fresh wheat straw add gypsum or chalk in the amount of 1 kg, ammonium sulfate 25 g, 8 kg of fresh cow or horse manure, or chicken droppings. Depending on the type of manure, it will take from 23 to 26 days to prepare the substrate.
If mushrooms are grown throughout the year, you will need to prepare a room with a temperature higher than +10 degrees - this is the optimal temperature for preparing the substrate. If you plan to grow mushrooms in the summer-autumn period, then a moisture-proof canopy over a concrete or asphalt-covered area will be sufficient - the mass should not have contact with the ground.
The technology for preparing compost mass is as follows:
The optimal dimensions of the heap are 1.5 m in height and the same in width. When forming a heap, you should remember that it must contain at least 100 kg of straw - with less of it, fermentation may be slow or not start at all - the heating temperature will be too low. The greater the amount of substrate that is prepared simultaneously in the pile, the higher its quality will be and the greater the amount of mycelium can be obtained.

The heap will need to be rebuilt after 5-7 days, which will require additional moisture for each layer. The interruption is carried out in such a way that the areas located on the outside move inside the collar, and the inside areas move outside. In the process of preparing one portion, it is recommended to perform the interruption 4 times - each of them will lead to equalization of the time required to complete the process - the fact is that it occurs at different depths in different ways. Moisturizing is done daily, but you should not give more water than the formed pile can hold.
Usually, readiness is determined by the disappearance of the ammonia smell and the mass acquiring a dark brown color. As a rule, this happens on the third day after the last breaking of the heap. Now you can form compost beds with a layer at least 10 cm thick for planting mycelium, or put the compost in special containers or polyethylene bags with a layer of 20 cm.
Experienced mushroom growers recommend buying mycelium from well-known manufacturers - if the technology was violated during its production, or its warehousing and storage were carried out incorrectly, then it is very likely that the thread-like formations called hyphae died - in this case, the growth of the mycelium will not occur. The best option is vegetative propagation of champignons, when the mycelium obtained in the laboratory is sown. Most often, rooms with constantly high humidity and stable temperature are used for sowing mycelium, for example, cellars. If the mycelium is purchased in the form of compost blocks, then you will not need to prepare compost yourself.
Only cooled compost is suitable for sowing mycelium - to reduce the temperature, spread it out in a thin layer and wait until it drops below +25 degrees. It is recommended to maintain this condition - otherwise, the subsequent increase in temperature after sowing will lead to inhibition of the development of the mycelium or its death.
Sowing is carried out according to the following standards: 1 ton of compost will require 6 kg or 10 liters of grain mycelium. If you grow mushrooms for your own consumption, in small quantities, then you can focus on the following standards: one two-hundred-gram package of mycelium per 40 kg of substrate. It is sown in prepared holes that are about 8 cm deep and located in increments of at least 15 cm between the rows and holes in the row itself. Adjacent rows should have holes arranged in a checkerboard pattern. Seeding can be done manually or using a special cutter and roller.
To maintain stable humidity, the substrate, after sowing the mycelium, is covered with straw mats or burlap. To prevent diseases of the mycelium, it is recommended to treat it every third day with a two percent formaldehyde solution.
In the case of cultivation using uncovered technology, the air is humidified by watering the floor and walls - moisture getting on the compost can cause mycelium disease. The best temperature for the growth of mycelium is + 23 C, while the substrate temperature should be within 24-25 degrees.
It will take 10-12 days for the mycelium to grow under optimal temperature conditions. During this period, a large number of thin white hyphae will appear in the substrate. If the threads become noticeable on the surface, they need to be covered with a layer of peat mixed with a small amount of chalk. It is recommended to adhere to the following proportion: for 6 parts of peat, take 1 part of chalk and 3 parts of dolomite chips. The thickness of the poured layer should be about 3-4 cm.
After 4-5 days after this procedure, it is recommended to reduce the room temperature to +17C. You should also start watering the top layer of compost using a watering can. The amount of water should not be large - it should moisten only the top layer, without going into the compost layer.
It is very important that during sowing of the mycelium and during the growing process there is an air flow into the room - if the carbon dioxide content in the air exceeds the norm, the growth of mushrooms will slow down. Humidity should be kept at 60-70% throughout the process. Fruiting of mushrooms will begin approximately on the twentieth to twenty-fifth day after planting the mycelium. Fruiting occurs simultaneously, the breaks between its peaks can be 3-5 days. The duration of the period is from 50 to 60 days.
Successful cultivation of champignons ends with harvesting, which is done manually, as if twisting the mushroom out of the mycelium. It is advisable that the air temperature during the harvesting period be from +12 to +18 C. To prevent spots from appearing on the champignon caps, the room is well ventilated before starting work. Experienced mushroom pickers determine best time To harvest, watch the film connecting the champignon cap to the stem - you need it to stretch well, but it is undesirable to allow it to break. After harvesting, the mushrooms are sorted, setting aside damaged and overripe specimens.

Harvest every other day or daily. When fruiting ends with the substrate, it will be possible to fertilize the soil in the beds.

To grow champignons, you can also use ordinary beds under open air. This method is more economical and does not require large financial outlays. The main task is proper preparation of compost. To prepare it, you can use horse or chicken manure. In the process of preparing it, which lasts about a month, you will need:
A layer of substrate up to 35 cm thick should be laid out on the bed, the mycelium can be planted at a compost temperature of about +23 +25 C, the air temperature should not be lower than +20 C. The size of the mycelium for planting in one hole should be the size of a chicken egg, optimal the depth of the hole is 5 cm. After planting, the holes are covered with substrate, watered, and covered with a layer of film or newspaper to retain moisture in the soil.
After 20 days, when the mycelium appears, the cover is removed and the bed is covered with a layer of peat mixed with turf soil. Fruiting in open ground continues for two months; the harvest should be harvested in a timely manner - otherwise the mycelium will be severely depleted. Watering the area should be done twice a week with heated water from a watering can.
Today we will talk about how to independently breed and grow champignon mushrooms at home yourself. We will also look at proven technology on how to grow a rich harvest of champignons with your own hands without much expense.
Champignon can be grown in spring and summer in garden beds, and in autumn and winter - in enclosed spaces (champignon farms, greenhouses, basements, cellars, greenhouses, etc.), where it is possible to maintain a more or less constant temperature - plus 12-18 ° and humidity within 65-85%.
The nutrient medium (substrate) for them is fresh horse manure with straw bedding or a mixture of horse and cow manure with rye or wheat straw. In the absence of cow manure, you can add chicken manure or pig manure to the substrate, and instead of straw - fresh fallen tree leaves and corn stalks. Old rotted manure and rotten straw are not suitable for the substrate. Champignons do not require light to grow and develop. They grow well and bear fruit in the dark.
Substrate preparation. If the substrate is laid from horse manure with bedding, then it should first be laid in a cone-shaped pile and watered with water or slurry, bringing the humidity to 60-70%.
Then add ammonium sulfate to it at the rate of 3 kg per 1 ton of manure. Cover the heap with straw, mats or burlap so that the water does not evaporate from it and the manure begins to heat up. Ammonium sulfate is added to enhance the activity of bacteria involved in the decomposition of manure.
After five days, the manure should be thoroughly shaken (beat) with a pitchfork so that it is well mixed and heated evenly. During the first shaking, gypsum is added at the rate of 4 kg per 1 ton of manure. Then every five days you need to shake it 2-3 more times. By the end of preparation, the substrate should become a homogeneous mass of dark brown color, devoid of the smell of ammonia. The straw in the substrate should be easily torn. Such a substrate is considered ready for laying.
To prepare a substrate from wheat straw with chicken manure, you need to add 400 kg of chicken manure, 25 kg of urea and 60 kg of gypsum per 1 ton of straw.
First, the straw should be mixed with 150 kg of chicken manure and 25 kg of urea (in solution). Spray it with water for 10 days. During this time, 1 ton of straw should absorb approximately 2500-3000 liters of water. Then the straw must be folded into a pile, layered with chicken droppings (250 kg per 1 ton of dry straw).
The first cutting is carried out on the fourth day after soaking the straw. In this case, the full amount of gypsum is added. The second interruption is on the eighth day, and the third on the eleventh. On the thirteenth day, the substrate is ready for laying.
If the substrate is prepared from a mixture of horse and cow manure with straw, then it is placed in a stack 2-3 m wide and 1.5 m high, then moistened with water. During the first cutting, areas that were not sufficiently moistened are watered with water and ammonium sulfate (3 kg per 1 ton) is added. During the third interruption, gypsum (5 kg) and superphosphate (3 kg per 1 ton of mixture) are added.
Laying soils. Indoors, champignons are grown on an earthen floor, on beds or on racks, as well as in wooden boxes, which are placed on top of each other in stacks 2 m or more high.
On an earthen floor, ridges are made measuring 50x50 or 75x75 cm. The prepared manure is first laid in a layer 45 cm thick, then compacted with a tamper to 30 cm. The ridges are leveled on the sides and compacted with a shovel.
Manure is placed on racks in a layer of 30-45 cm, and then compacted evenly so that its surface is even and smooth.
Boxes for growing mushrooms can be of different sizes. The most convenient are considered to be boxes 100 cm long, 50 cm wide, 25 cm high. They are filled with manure so that after compaction the layer thickness is approximately 23 cm. Manure is compacted with hand tampers.
In open ground, the formation of ridges begins early in the spring, as soon as the soil thaws and warms up. Manure is placed directly on the ground, just like in a greenhouse, or in a trench 20-25 cm deep. Choose a slightly shaded place for laying. Canopies are made over the beds to protect them from waterlogging during rain and from direct sunlight.
Planting mycelium. After laying the soil, it is recommended to measure the temperature of the substrate daily. When at a depth of 4-5 cm it drops to 27-28°, you can begin planting mycelium.
The best planting material for champignon culture is sterile mycelium, grown in special laboratories. This mycelium can be purchased at the Seeds - by mail store. The highest yields are produced by two varieties of champignons: two-spore brown and two-spore white.
In the laboratory, champignon mycelium is grown on manure or grains (wheat, oats, rye). Dung mycelium weighing 1-2 kg is sold in jars, and grain mycelium is sold in one-liter milk bottles or one-two-three-liter jars.
For 1 sq.m, 400-500 g of dung mycelium are consumed, and 300-400 g of grain mycelium.
Before planting, dung mycelium is broken into pieces the size of walnut or a pigeon egg weighing 15-20 g and placed in a basin or sieve in one layer so as not to crush it. Pieces of mycelium are planted in the ground in a checkerboard pattern at a distance of 20x20 or 22x22 cm.
The landing technique is simple. In the intended place, use a sharp peg to lift the top layer of soil, make a depression under it, into which a piece of mycelium is placed so that after planting its upper edge lies 2-3 cm below the surface of the substrate.
If grain mycelium is used for planting, then first remove a layer of substrate (about 3 cm) from the surface of the ridge, and then scatter the mycelium evenly. After this, it is sprinkled with compost and lightly crushed to create contact between the mycelium grains and the substrate.
You can use wild mycelium for planting. You need to look for it in those places where champignons grow: near barnyards, near manure and compost heaps, near greenhouses, in landfills, etc.
The mycelium should be dug up where the fruiting bodies of these mushrooms appear in abundance.
The prepared pieces of soil should be densely permeated with cobwebby branches of white mycelium, have a pleasant mushroom smell, and have no signs of damage by pests and diseases.
Planting wild mycelium is carried out in the same way as dung.
Caring for champignons. After planting the mycelium, the room temperature must be maintained within 24-26°. Under these conditions, the mycelium grows deep into the soil and produces a good harvest of mushrooms. At higher temperatures, the mycelium grows in the surface layer and forms fewer fruiting bodies.
The substrate humidity should be about 55-60%.
If the soil dries out, the mycelium grows worse. To prevent this, the substrate should be moistened by spraying it evenly with water from a backpack or garden sprayer. This must be done carefully, not allowing water to penetrate into the manure mixture and damage the mycelium.
After 10-12 days, when the mycelium has grown well, the temperature in the room should be reduced to 18-20°, and the soil surface should be covered with earth. The soil should be turfy, loamy or sandy loam, finely lumpy in structure, and sufficiently moist. Before pouring, it should be passed through a screen with 1-2 cm holes. The soil should be poured evenly. Its layer should not exceed 3-4 cm. However, under no circumstances should it be compacted, as this may impair air access to the mycelium.Further care for champignons consists of maintaining normal temperature (about 16-20°), air humidity (80-90%) and soil layer (up to 60%), as well as regularly ventilating the room to remove accumulated carbon dioxide.
35-40 days after planting the mycelium, the first fruiting bodies of champignons appear.
Fruiting lasts two to three months.
While the compost is maturing, you can arrange shelves and boxes for planting in the room allocated for growing. The height of the latter is about 10-20 centimeters.
When the compost is ready, fill the boxes with it, and then add the mycelium. The compost temperature should be 25°C ±2°C. After planting, it is necessary to strictly monitor the temperature of the mycelium. If the temperature begins to exceed 30°C, it is advisable to cool the room slightly, but without creating a draft.
It is almost impossible to grow mycelium on your own. It is usually purchased from nurseries or specialized laboratories.
After fourteen days, the mycelium should grow and become almost white. After this, it must be covered with a layer of soil consisting half of turf soil and peat, half of calcium (chalk). The soil is pre-treated with boiling water.
This is done in order to eliminate pests and disinfect the soil from diseases and mold. The fact is that champignons are very sensitive to various types of infections.
The temperature regime for further growth should be up to 15-20°C. Reduce it gradually, not sharply.
As you know, all mushrooms love high humidity, and champignons are no exception. The percentage of moisture at the time of mycelium formation should be from 70 to 95%, and during the direct growth of mushrooms from 60 to 75%. Watering is carried out using the drip method, since watering with a stream of water can destroy the mycelium.
With the right approach, growing champignons at home ensures harvesting within 90 days from planting. In this case, champignons grow in several stages over two to three months, during which they can be harvested up to seven times.
Champignons are one of the most common types of mushrooms. Next, we will talk in detail about growing champignons at home for beginners. As you will see for yourself, this process is quite simple, anyone can handle it. Although, of course, it also has its own subtleties that need to be taken into account.
If you follow all the recommendations given below, you can get a good mushroom harvest. There will be enough of it not only for yourself, but also for sale. True, growing mushrooms in a city apartment is unlikely to work. It's better to do this at the dacha.
The technology for growing champignons in the country is quite simple. But to implement it, you may need some materials and equipment.
Equipment for growing mushrooms in general is not necessary. However, it greatly simplifies the process and increases the quantity and quality of the resulting mushrooms. It will be useful to use the following:
Growing champignons in large volumes requires the availability of equipment that allows you to mechanize some processes. For example, a lift with a winch and a conveyor.

The first step is to prepare the substrate. This is the most difficult thing about growing mushrooms. And it is on this that the final result largely depends.
For preparation, manure is used (preferably horse manure, but you can also use cow or bird manure) and straw in a ratio of approximately 4:1, in the case of using bird droppings - 1:1. Due to the rather unpleasant odor of the components, as well as the release of toxic gases during the process, it is better to prepare the substrate in the air, for example, on an unused plot of land in a summer house. But always under a canopy that protects it from direct sunlight and precipitation. As a last resort, it can be done indoors, but in a non-residential and well-ventilated area.
When using horse or cow excrement, eight kilograms of gypsum, five chalk, two each of urea and superphosphate must be added to one hundred kilograms of straw. If bird straws are used, then about three hundred more liters of water should be added to the same amount of straw, and chalk and superphosphate should be replaced with alabaster. Naturally, the numbers are given for the convenience of calculations, but you need to make as much substrate as necessary. The result in the above example is enough for about three square meters of mycelium.
First, the straw is soaked for 24 hours. After this, it and the manure are laid on top of each other, three to four layers of each component. At the same time, the straw is additionally moistened, especially abundantly if bird droppings were used. Next, urea and half a kilo of superphosphate are added. After this, everything is thoroughly mixed, gypsum, the remaining phosphate and chalk are added. After adding each component, stirring must be repeated. In about a month, the nutrient medium for growing champignons will be ready.

So, the substrate is ready, now you need to plant the mushrooms. For one square meter of nutrient medium you will need about four hundred grams of grain mycelium or five hundred grams of compost.
Before sowing spores, it is recommended to heat treat the substrate. After this, it must be cooled to twenty-five degrees Celsius. If everything is done correctly, the finished material will be elastic, slightly springy when pressed with your hand. Now you need to put it in wooden boxes. The quantity is calculated based on their area - approximately one hundred kilograms per square meter.
The actual landing is done as follows. Holes three to four centimeters deep are made in the substrate with a peg at a distance of at least twenty centimeters from each other. Planting material is introduced into them: a handful of dry material or a small lump of wet material. If grain spores are used, you can also simply scatter them evenly over the surface and cover them with a four-centimeter layer of substrate.
Then the boxes are covered with burlap, which is sprayed with water as needed. Air humidity should be high, about ninety percent, but avoid getting liquid on the germinating mushrooms.

Growing champignons in a basement or cellar - in a word, indoors - is the most popular way of growing mushrooms in the country. This is where lighting equipment comes in handy. The champignons themselves do not require light to grow, but a person is not able to see in the dark, and caring for plantings with a flashlight in hand will not be very convenient.
Watering mushrooms during the first month of growth is unacceptable. At this time, the mycelium grows, and any liquid that gets on it can lead to the death of the entire crop. However, the overall humidity in the room should be maintained at ninety to ninety-five percent. The top layer of soil should also not be allowed to dry out. To achieve this goal, a method is used of covering boxes with seedlings with burlap, which is regularly moistened with water.
The temperature inside the substrate should be maintained at twenty-five to twenty-seven degrees Celsius. This is the most best option to achieve high yields. In principle, the temperature can be a little more or a little less.
It is important to remember that at temperatures above thirty and below twenty degrees, growing champignons is impossible, since the mycelium dies.
In a month, mushroom germination should begin. From this moment on, the procedure for caring for them changes. The burlap is removed from the boxes, the sprouted champignons are sprinkled with a layer of soil. After which it is watered, but not too much. The substrate should be moist, but not wet. Further, until harvesting, it should be maintained in this condition.
The total air humidity should be reduced to eighty percent, the temperature to fifteen to seventeen degrees. It is during this period that it is especially important to ventilate the room well. The air should be fresh and clean, but drafts and active movement of air currents directly above the boxes with mushrooms should not be allowed.

But not everyone who plans to grow champignons in their country house has the opportunity to use an enclosed space for this. In principle, you can try growing mushrooms outdoors, right in the garden. However, this will be much more difficult, since the care requirements remain the same.
First you need to choose a place. It should be shaded, since bright light, especially direct light, harms the champignons. There must also be a canopy over the entire bed to protect it from precipitation.
The growing substrate in this case is buried in the ground to a depth of about forty centimeters. Its quantity is still one hundred kilograms per square meter. The spores are placed into it to a depth of no more than a centimeter, after which everything is sprinkled with soil. The bed must be covered with plastic wrap or the same burlap. It can be removed in a month, after the first shoots appear.
Growing champignons in the countryside outdoors is best done in the fall, when the temperature is between fifteen and seventeen degrees. This will solve the problem of care after germination of the mycelium. And the film covering the planting until this moment will prevent the mushrooms from freezing during the period when it is necessary to maintain a high soil temperature.
Using a greenhouse is the best way to grow mushrooms in the country. It is easier to organize ventilation and maintain temperature and humidity conditions without using special equipment.

So, growing champignons on your own in the country is generally not difficult. However, there are several important points to consider.
If these conditions are met, growing champignons in the country will be an easy task, yielding a very decent harvest.
Growing champignons at home for both beginners and experienced mushroom pickers is modern, fashionable, exciting and profitable occupation. This is both a kind of hobby and a source of additional income, if you approach the matter rationally and competently. Knowing how to grow champignons at home, you can provide yourself, as well as your friends and relatives, with a quality product. Champignons are a fairly popular, always in demand, tasty and healthy food product. They do not linger on store shelves, despite the fact that they do not have the lowest cost. By growing them yourself, you will always be sure of their “pure” origin.
Champignons, photo:
They are healthy: they contain glucose, carbohydrates, vitamins, 18 amino acids, and easily digestible fats. They also go harmoniously with any food; they can be boiled, fried, baked, pickled, canned.
This mushroom is incredibly tasty, low in calories, and is an excellent alternative to meat (which undoubtedly attracts the attention of vegetarians).
Before you start mushroom growing, you should sensibly assess your desires and capabilities. In addition to time and financial investments (purchase of materials), you must have appropriate premises. Some skills, detailed study of information on relevant Internet forums, the presence of a competent adviser will never hurt you. If we compare the process of growing champignons and oyster mushrooms, then our case, of course, is more labor-intensive. But if you compare it with the worries and nuances of growing porcini mushrooms, then it will be much easier and shorter in time.
If we consider natural conditions, they are found almost everywhere. Forests, steppes, meadows, edges, lowlands, open spaces with moist soil and even semi-deserts, mountain forests are common places of growth.
As for “home” conditions, they can grow in a garden or vegetable garden, cellar, basement, specially equipped garage, or greenhouse.
How to grow champignons? Many years of experience of mushroom pickers have proven that they grow best where the basement is equipped with good ventilation.
In this case, the air temperature should be relatively cool (not higher than +20 °C), and if this process is put into operation, then the mercury column on the thermometer should vary between +12..+18 °C year-round. The humidity percentage should be approximately 70..85%, lighting does not play a special role.
Necessary factors for a successful process are:
As mentioned above, under properly organized conditions, mushrooms can be grown throughout the year. The technology itself is not highly complex, as it might initially seem. From the very beginning, you need to arrange everything correctly, and then the process will follow the well-worn path. This work can even be called creative, something like a hobby. To date, breeders have developed approximately 50 varieties of this mushroom, which have slight differences in appearance. The color of the cap, its structure, and storage duration may vary, but all cultivated varieties are “children” of the ordinary white champignon.
An example of a light brown variety in the photo:

Let's take a look at basement cultivation as a basic example, since this method considered the most common. For so-called “cellar” breeding, it is best to choose high-yielding varieties such as Sylvan 130, Hauser A15 or Somycel 512. They are quite unpretentious, not difficult to care for, and are also very prolific.
Remember - the most important factor for the successful result of your efforts is the presence of well-established ventilation in the room where the mushrooms will grow!
A constant flow of fresh air is very important, since during growth they emit carbon dioxide, and its excessive concentration in the room leads to stretching and elongation of the mushroom stalk.
How to grow champignons at home - disinfection of the premises:
After any treatment, the room must be properly ventilated - this is also a prerequisite.
Let's return to ventilation, or rather, let's clarify one nuance: the air should be fresh, but drafts should be excluded. It is better to cover the ventilation pipes (“smotherers”) with fine mesh nets - this will create an obstacle to the penetration of insects, as well as a small barrier to air masses. If you have a large, serious room, and cultivation is on stream, then the ventilation system should be more global, with additional fans located above each large box. If opportunities permit, then installing air purifiers with replaceable filters will not be superfluous for this matter.
It is clear that a thermometer and hygrometer are simply necessary for the room where mushrooms are grown. This way you can always control the level of air humidity: if there is a lack, irrigate with water from a spray bottle, if there is an excess, ventilate. With the onset of summer heat, fans solve this problem, but if this type of mushroom is grown all year round, then in addition to all the above-mentioned benefits of civilization, you will also need additional heating basement or cellar.
Large cellar room, photo:

It is best if your cellar, in addition to all the requirements for growing, has an earthen floor (not concrete). By and large, the more purposefully the room is adapted specifically for mushroom growing, the better it will be. Any unnecessary additional factors in the basement, cellar, garage or barn that are not related to the topic of growing mushrooms will only interfere and disturb the “microclimate” of the room.
To the “advantages” of mushroom science we can add the fact that they are able to bear fruit perfectly even in complete darkness. This distinguishes them from all other green inhabitants. The weakest light bulb is enough - they will feel comfortable, but the light will most likely be more useful to you in order to comfortably navigate the place.
If growing champignons at home initially has far-reaching plans, and the owner has a large room, then dividing it into 2 zones will be a reasonable, convenient solution. Simply put, mushrooms must originate somewhere, and a specially prepared substrate is designed for this process (more on that a little later). So, in one zone there will be a substrate along which the mycelium will spread (this is called incubation). In the second compartment the boxes with mushrooms will be placed directly, where they will be forced out.
The temperature regime of these two compartments should also be different: the mycelium usually grows at a temperature of +23..+24 C°, and the growth of fungi occurs at a temperature column of +16..+18 C°. If you get used to it and develop your own “schedule” for moving boxes from one zone to another, you will be able to grow these delicious, beloved mushrooms all year round.
Preparation of compost (substrate) is one of the most critical aspects of mushroom growing. The quality of the mushrooms will directly depend on the properly prepared substrate. Usually, when you buy champignon mycelium, the packaging with the contents indicates the substrate corresponding to the given variety, as well as the nuances of its preparation. The varieties are different, and the composition of the compost and its collection technology may vary. However, most often these parameters do not differ significantly.

The substrate should be prepared either in a room specially designated for these purposes, or in the open air (on the street), under a well-equipped canopy. It is important that the compost is not exposed to precipitation (rain) or sunlight. It is also highly recommended not to pour compost onto “bare” soil - lay a sheet of thick plastic film. Thus, unwanted insects or any other pests will not penetrate into the substrate. It should not come into contact with the ground, but blowing air over it from all sides is a must!
Compost for champignons should be moderately moist, as excess moisture can disrupt proper fermentation processes.
Be that as it may, the street - best place for the maturation of the substrate, the active release of ammonia and carbon dioxide will not be useful to anyone. The average time for the substrate to be “ready” and fermented is approximately 25-30 days. During this period, it is recommended to stir it at least three times (to ensure uniform fermentation). You will know that the process has come to an end by the absence of the specific smell of ammonia. By this time its color acquires a brownish tint. While the substrate is fermenting, the temperature inside it can be approximately +50..+65 C°, and ready-to-use compost has a temperature of no more than +24..+25 C°.
By the way, to enrich the contents of the compost when first mixing it, you can add crushed lime to the general composition. During the second mixing - superphosphate fertilizer, during the third - ground gypsum or its construction analogue (alabaster). The already “ready” substrate, in addition to the characteristics described above, does not stick to your hands, is springy upon tactile contact, the straw is extremely softened, and is easily divided into fragments.
As an alternative to the independent process of compiling a substrate, we can recommend purchasing ready-made compost, which is sold in the gardening departments of supermarkets or flower shops. Of course, such a substrate will be of lower quality than one prepared by hand, even though it will be written on the packaging that it has all the required characteristics.
Here it’s up to you to decide what is more convenient for you, whether you have the time to carry out all the preparations for growing these mushrooms. Looking at the general characteristics of “good” compost, let's highlight the main ingredients.
Composition of compost for growing champignons:
How to grow champignons at home? Use fresh animal products while they still contain the most nutrients. Make sure that the added components do not contain pine shavings or sawdust - they release resin, and these mushrooms sense it and react painfully to its presence. Phosphorus fertilizers, as well as urea, are actually very recommended and useful - they are sources of phosphorus and nitrogen, which are so necessary for champignons. But chalk normalizes the acidity of the substrate and maintains an optimal pH level.
Champignons: growing at home - the easiest way to create layers:
The so-called “care” of compost has already been described above, but I would like to add and repeat the warning regarding excessive moisture. Too much moisture in the substrate will slow down its maturation, but what’s even worse is that it will wash out from the mixture all the useful ingredients required for development and growth.
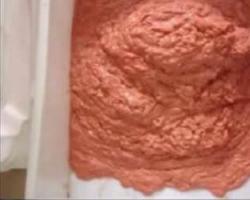
Compost components (dry hay, horse manure, fertilizers), photo:


The substrate, of course, should be purchased from a reliable representative (best of all - special laboratories). When the compost is already ripe, we transfer it to an appointed place, put it in boxes or special forms, where further actions will take place:
A harvest from one mycelium can produce from 5 to 8 periods of ripening of new mushrooms. This is called a “wave”; the most generous collection of champignons occurs in the first three “waves”. Here it is important to catch the moment of ripening - when the cap underneath is still covered with thin white skin (film), and the brown plates are not yet visible. The mushrooms need to be unscrewed from their place of growth, but not cut off (so that harmful bacteria do not penetrate into the mycelium through the cut site).
After the crop is harvested, carefully sprinkle the substrate again with the soil mixture described above. During the next two weeks they will grow especially actively.
A mushroom correctly extracted from the soil, photo:

Cap in optimal state of maturation, photo:

In addition to the above-described, most commonly used “basement” method of growing mushrooms, there are other alternative options. For example, how to grow champignons at home, namely in a summer cottage. Sometimes, for some reason (lack of a basement, garage or other suitable premises), the desire to grow these mushrooms seems impossible. But if you are the happy owner of a summer cottage, everything is possible!

The most successful period for this is summer and autumn; here it is also important to choose a comfortable place. Champignons - where do they grow? In shaded places, on specially prepared soil, the place for the mycelium should be moderately moist, the soil should not dry out, and the sun's rays should not illuminate the chosen place too much. To protect against drought on hot days, beds are often covered with plastic film or special covering material to create a certain microclimate. It is important to bring mushrooms as close as possible to conditions similar to their natural growth environment. Since we cannot influence weather conditions, we need to try to give the mushrooms moisture when they need it, as well as the presence of fresh air.
In the garden bed under the trees, photo:


After sowing the mycelium in the beds, in the open ground, growing champignons - their technology is practically no different from the rules for growing them in the cellar. After a couple of weeks, the “webs” of mycelium grow over the soil surface; at this point, the temperature is lowered by sprinkling the soil surface with a thin (up to 5 cm) layer of damp soil. The temperature, similarly, should vary between +12..+15 C°, but in no case reach above +20 C°. As with the method described above, it will be much more productive if this land contains peat and limestone. Regular watering (or rather, gentle irrigation) is best done after sunset - this will optimally moisten the soil and prevent the formation of a dense earthen crust. With the right approach to business, in about 3-4 weeks you can expect a harvest of your own mushrooms.
The mycelium puts out “cobwebs”, photo:

Let's summarize how to grow champignons in the country:
After all the waves of the mushroom harvest have died down, the spent substrate can simply be disposed of, or can be quite successfully used as organic fertilizer or mulch for some trees or even flower beds. Of course, it will no longer be suitable for re-growing mushrooms, but it will serve as an excellent supplement for your green inhabitants. As for all kinds of containers, boxes after harvesting and composting, they will require mandatory disinfection, as well as the room where the mushrooms were grown.
Champignons are considered the most common types of mushrooms, so there is no need to advertise them further. The product is widely used in cooking; first and second courses, canned snacks, and salads are prepared on its basis. Due to their high protein content, champignons are an excellent source of protein. Experienced gardeners prefer to grow mushrooms on their own, but the procedure has a number of features. To fully comply with the technology, you must follow the step-by-step instructions.


Prepare compost for growing champignons, purchase mycelium. Maintain the required temperature and soil moisture, and harvest in stages. Do not use the used composition a second time. After harvesting, disinfect the mushroom containers and the room in which they were grown.