Hello, dear decoupage lovers.
They say correctly that a wooden board is the most practical and safest for health. So we decided at one of the creative meetings that in addition to the above advantages, let our boards also become a decoration for our kitchen. Today in this photo master class you will see how you can decoupage a cutting board with your own hands.
So let's begin.
Materials and tools
We begin to apply the picture by implanting it into the surface.
Cover the board with a thin layer of acrylic varnish. This is how we prepare it for applying the image. The surface must be smooth and non-absorbent, i.e. varnished. In this case, for implantation we use acrylic glossy varnish for Tikkurila Kiva furniture. If there is none, try any other varnish that you have available.

The printout must be cut out with a slight indentation from the image so that a white background of approximately 5-8 mm remains.
We coat the varnished surface again with the same glossy varnish and, without waiting for it to dry, apply the varnish to the image. We glue it with a pattern into the surface, gently smoothing it with our fingers to fix the paper on the board. Cover the printout with a file and a plastic card or napkin, moving from the central part to the edge to drive out the excess varnish.

We send the board to dry for 3-4 hours. By the way, the process can be speeded up with a hairdryer.
If everything is ready, you can proceed to the most interesting and long-awaited stage. We moisten the paper with a wet cloth or sponge and begin to roll the paper.

The process is very exciting and exciting. Our task is to roll up the entire paper layer. Don't be afraid of dirt; it can be washed off under running cool water or wiped with a damp cloth.

If everything is ready, cover the image with acrylic matte varnish in about 3 thin layers and let it dry.

Voila, the board is ready. If desired, you can reverse side for cutting, cover with special oil for kitchen utensils, as we will do.

Make sure the wood surface is dry and clean before applying oil. Apply the oil to the board with a brush and leave for about 20-30 minutes. If necessary, sand with 320-400 grit while it is wet. Then use a lint-free cloth to remove excess oil. Upon completion of work, polishing is recommended to improve the hardness of the coating. Maximum hardness is achieved after 24 hours.
Thank you for visiting, leave comments and your ratings. Let this master class inspire you to new ideas and to create such necessary accessories for the kitchen. Until next time.


A technique such as decoupage gives a lot of room for creativity. With its help you can give absolutely new look old things or your own individual style that you won’t find in stores. The creative technique here is very simple, it consists of cutting a design and transferring it to various surfaces; after processing with varnish, the design resembles a real artistic painting.
Today we will practice this technique and transform an ordinary cutting board, an item that is easy to find in every home.

Most cutting boards are wooden, which is convenient for a beginner; wood is the most convenient material for creativity, convenient and comfortable, it is easy to prepare for work.


Also, the board is a flat object, without sharp volumetric rolls, there is no problem in gluing any part of the design without creases. A decoupage cutting board is a simple project that's perfect for a beginner.

Glue: can be used either special for decoupage or PVA; in the second case, you need to understand that over time it can turn yellow and for things that you plan to use for a long time this is a big disadvantage. On the other hand, for beginners it will clearly cost less than professional glue, which is selected for certain surfaces.

Acrylic paint must be white, other colors are at your discretion.


Brushes: For glue and paints it is better to have a separate one, it is good to have several brushes of different sizes. They should always be cleaned immediately, otherwise, when the glue dries, difficulties may arise even with the cleaner. In general, it is best to periodically wash the brushes with soap or inexpensive shampoo.

Sponge or sponge: A sponge is essentially the same sponge, only attached to a brush stick; you can build a similar device yourself.

Sandpaper or sandpaper: it is best to have several types for different materials.

Primer: for leveling surfaces.


Varnish: acrylic varnish is usually used, preferably in a can, more convenient for work.

We sand the board with coarse sandpaper or sandpaper so that the surface is as smooth as possible and without roughness. You also remove dirt and dust accumulated on the board, if it is not new, which has managed to be absorbed into the top layer of wood.

To better level the surface, you can treat it with a primer. If you have not worked with primer, remember that the movement of the brush should be as if you were driving the primer between the fibers of the wood of the board, trying to fill all the free space inside.

IMPORTANT! If a drawing was depicted on the board, it must be removed with sandpaper; if the drawing is cut out, it must be covered with a primer.


Selection of drawing. You should think about how the transformed piece of furniture will combine with the surrounding space, the same kitchen and household utensils.

For example, in this tutorial, the cutting board is decoupaged in a Provence style that is neutral enough to go with a regular, classic kitchen. But if you have a brighter interior, made in a certain theme, perhaps you should choose something closer to it.

Check the arrangement of the details of the drawing and choose the best one. During the process, it will be unpleasant if you suddenly did not calculate in advance and some detail suddenly did not fit. It's better to check everything in advance. Also keep in mind that the paper is retracted by 0.5-0.8 cm, and the position of the pattern may change.

Using a sponge (if you don’t have one, a soft dishwashing sponge will serve as a substitute), paint the board where the design will be placed with white paint. There is no need to smear the sponge on the board; use it to gently trample the paint into the wood. A sponge is needed so that the painting is as accurate as possible and no bubbles form on the surface.


Apply 2 coats of paint this way, wait for the paint to dry, then smooth out any uneven areas with sandpaper. Before gluing the napkin, remove the unnecessary bottom two layers from it. Mix the sizing mixture: glue and water, you should get something similar to liquid sour cream. Then place the design on the board, dip your brush into the glue solution and apply a drop onto the center of the design.


In the photo you can see an almost finished decoupage cutting board. All that remains is to seal the work with varnish. It is best to do this from a distance and in several layers. Please note that if you plan to use the board not as a piece of furniture and will wash it, it is best to use yacht varnish rather than acrylic varnish.


Decoupage cutting board - despite the simplicity of the material, it requires attention for beginners. To avoid defects, do not forget:


For many women, decorating the kitchen is a pleasant experience. To make the room in which you have to spend a lot of time preparing dishes not boring and pleasing to the eye, I suggest decorating a cutting board using the decoupage technique.
In this case, I decoupaged a wooden cutting board measuring 18x29 cm. It is best to buy a cutting board for decoupage made of hardwood.

First, the preparatory period before decoupage. Sand the board with fine sandpaper. The movements of the sandpaper on wood should be along the grain in order to sand the surface to an absolutely even state.

I sealed the sides of the cutting board with masking tape, although later I still tinted them a little.

If you do not have a special primer for wood, apply the first layer of white acrylic paint. You need to work with a brush, paint the wood with a very thin layer of paint, rubbing it firmly into the wood. You also need to brush along the fibers.

When wet, the wood fibers always “rise” a little, so they should be sanded after the paint has dried.

The next layer of white acrylic should be applied with a foam sponge so that there are no streaks left from the brush.

The preparatory stage is over and while the paint is drying, there is time to choose a napkin for decoupage. For the kitchen I took a bright pattern with a bunch of grapes.

I suggest sticking a napkin in an unusual way, “dry” (without glue for decoupage). Using a regular glue stick, sketch a surface on the board that is the same size as the fragment to be glued. And you should wait a little until the glue begins to dry.

The prepared drawing (for me it was 1/4 of a napkin) is applied to the glue on one edge and carefully smoothed onto the board. Use your fingers to straighten the napkin and stretch it so that it sticks absolutely evenly and does not stretch (since it is not moistened).

Then, in order to secure the napkin firmly and protect it, it is covered with one layer of acrylic varnish (with an almost dry brush).

The varnish has dried, and now you can see that the napkin is glued absolutely evenly. However, there is still a lot of white surface left to paint on.

This is how I painted the decoupage of the cutting board. First, I mixed white, yellow and lemon acrylic (this is the choice of color specifically for my napkin), and did not stir the paint thoroughly to create a heterogeneous background. Using a foam sponge, I applied this color to one half of the design, stepping on the edge of the glued napkin.


When the underpainting has dried - I covered the decoupage boards for the kitchen with several layers of acrylic varnish - now the paints are protected from further work and if we don’t succeed in the next stage, we can wipe everything down and do it again.

When the varnish has dried, carefully sand the surface of the board with sandpaper until it becomes smooth.

Between the yellow and orange background on the napkin there was a black perforated strip, to continue it - put dots with a black acrylic outline. To make the row even, you can do this using a ruler (just make sure that the outline does not touch the ruler itself and does not smudge).

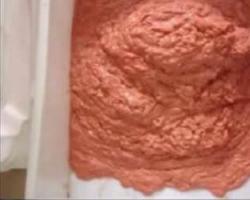
To further decorate the decoupage of the kitchen cutting board, you need to spray it and thus combine the entire painting into a single whole. Dip a toothbrush into the burnt umber paint and brush the paint off with your finger in a "toward" motion. The farther from the surface of the board you hold the brush, the smaller the droplets will be.

To make the spray more varied, spray the light half of the board with orange paint. It will “echo” the dark half of the decoupage and create a harmonious combination.

When the spray dries, apply another layer of acrylic varnish (as protection).

Paint the ends of the board and the inner surface of the hole by which the board is hung with burnt umber using a small foam sponge. Framing the decoupage in brown (to match the splashes) will give your work a finished look.

So that I could use such a beautiful cutting board often, I used parquet yacht varnish. Using a foam sponge, I spread the varnish in a thin layer over the surface of the board and along the sides. This varnish will protect your cutting board decoupage from moisture.

That's it, a cutting board using the decoupage technique can be used in the kitchen.
 Decoupage cutting board. Master class for beginners
Decoupage cutting board. Master class for beginners from Daria (Sweet Corner)
Materials:
1. Wooden decorative cutting board.
2. Abrasive sandpaper.
3. Round file.
4. White primer (white paint).
5. Napkin.
7. Synthetic brushes.
8. PVA glue (or decoupage glue).
9. Acrylic paints.
10. Patina.
11. Matte varnish.
Work process:
1. Sand the board.

2. We process the hole in the board with a round file.

3. Prime the surface (either with white primer or white acrylic paint). I have soil. You can use a brush or a sponge. We wait until it dries (or we dry it with a hairdryer).

4. Sand again to make a completely flat surface for gluing the napkin (evening out the waves from the brush, if any).

5. Select a napkin (motif).

6. Carefully tear off the edges of the napkin (motif).

7. Separate the top layer of the napkin from the two bottom ones.

8. Take water and a brush and start gluing the napkin to the board with water.

9. Drop water into the center of the napkin.

10. Constantly drawing water onto the brush, smooth the napkin from the center to the edges so that no wrinkles appear. To do this, we hold the napkin with our hands from the edges so that it seems to be suspended and not lying on the board. Water must be taken without sparing, but not in such a way that it flows.

11. When we smooth the napkin with water, you can start gluing it with glue.

12. Drop glue onto a napkin and also level the glue from the center to the edges with a brush. We are waiting for it to dry completely.

13. We select acrylic paints, matching the color scheme to those on the napkin.

14. In this case, in addition to acrylic paint, I have green and brown patinas. We begin to tint the edges with a sponge required colors, and also for a uniform background, you can also use a napkin. I like to apply patina carefully with my finger.
Made by yourself, it will decorate any kitchen. Even if the hostess does not use it, but simply places it as an element decorating the interior. In addition, such a plaque is good for friends, mothers, and sisters.
For work we took:
Wood is a natural material and has a rough and porous surface. Therefore, the very first step in our work is preparing the board for.
Sand the surface with sandpaper (Photo 1).

Then apply a thin layer of PVA glue. Let the board dry (Photo 2).

Prime the surface with white paint (Photo 3). If there are any unevenness, you can sand it again.

We tear out and lay out the napkin motif on the intended place of decoupage on the board (Photo 4). The fragment is large and it is better to transfer it using a file.

To do this, divide the napkin into layers, and take the top layer with the pattern (Photo 5). Turn it face down and place it on the file.

We wet it so that the napkin moves easily over the file (Photo 6). We smooth it out, eliminating wrinkles.

We transfer it to the board, press it and use a brush to expel excess water and air through the file (Photo 7).

We remove the file. But we don’t lift it up, but bend it at an angle and, slowly, remove it from the napkin (Photo 8, 9).


Using the same principle, we transfer the second fragment. Glue it on PVA. And we immediately glue small details, such as butterflies (Photo 10).

Dry the finished composition well (Photo 11).

Before finishing the background, we protect all the pictures with varnish (Photo 12).

Dry it. We complete the general background of the entire board (Photo 13,14). And dry it well again.


We create a three-dimensional drawing on one of the free corners of the board. We attach the stencil with construction tape (Photo 15)

and apply the paste with a palette knife (Photo 16).

After some time, remove the stencil and leave it to dry (Photo 17). We immediately wash the stencil with water.

For the aging effect we spray it. To do this, first dilute the paint a little with water. We apply paint to the toothbrush and, moving the stick along the bristles towards ourselves, make a spray (Photo 18).

Advice: First, practice on paper so that you don’t end up with too greasy drops.
Bituminous varnish gives another appearance of aging. We apply bitumen varnish to the butterfly (Photo 19).

We also use a sponge along the edge of the board, going a little onto the board itself. Thus, we imitate the abrasions of the board (Photo 20).

It turned out a little shabby aged without special effort and complex techniques (Photo 21).

Did you like the product and want to order the same from the author? Write to us.
More interesting:
See also:
Decoupage glass jar
Decoupage of a glass jar Surely many of us, going through a closet or pantry, find some...
Basket with flowers made from seeds and shells
Sergey Zhivilov from Sochi makes such wonderful things with his own hands, such as, for example, this panel from...
Another do-it-yourself brownie
Do-it-yourself brownie And again about the brownie :). Just because you've never seen him doesn't mean he...